Monday, May 30, 2011

Recipe #37 - Black Bean Quinoa Salad

_______________________________________________________________________________

This is an award winning recipe I found in the Commercial Appeal created by Megan Murphy, a Tennessee-licensed registered dietitian.

She writes, "Quinoa is a seed that kind of masquerades as a grain. Its consistency is grain-like, but its is noat a grain, and there is no gluten in it. The tiny uncooked quinoa particles swell up when you cook them into small round pellets and give a satisfying chew to dishes, including this one"

Quinoa also contains all 8 essential amino acids (proteins) needed in the human diet. Which makes it very poplar with vegans.


In a small bowl, toss the drained beans with the vinegar, salt and pepper. Let stand for about 30 minutes before draining off any excess liquid.


Meanwhile, in another bowl wash the quinoa in cold water, drain into a coffee filter or fine sieve set over a bowl or pot.

Bring 1 1/2 cups of water to a boil in a medium-sized pot, add quinoa. Lower heat and cover; cook for about 15 minutes until most of the water is absorbed. Set the pot of quinoa off the heat, and let it stand for about 20 minutes to finish absorbing the water.


Once quinoa has absorbed all the cooking water, transfer it to a large plate or bowl and allow to come to room temperature (using a plate spreads it out more so getting to room temperature doesn't take as long).


Once the quinoa is room temperature, put it in a good sized bowl or container. Add the drained beans, red bell pepper, red onions, jalapenos and cilantro; toss gently to combine.


In a smaller bowl, whisk together the lime juice, salt, cumin, and cayenne pepper. Add the oil in a stream, whisking continuously. Once the oil is all incorporated, add the dressing to the quinoa/bean mixture and stir gently to combine.


Love, love, LOVE, LoVe this one. Anything with black beans (the healthiest of the the beans) is good in my book. The cilantro, freshly picked from the garden, was of course perfect with the fresh lime juice. The cayenne pepper along with the jalapenos and roasted red pepper gave it a little punch that spiced up the quinoa.

The dressing was definitely my favorite part. I put together a salad the next night and made the exact dressing for the topper. I also made this recipe again about a week later for lunch. Very healthy. Very tasty.

Rating: 9
Time: 40 mins
Serves: 6, about 1 cup each.
Per serving: 260 calories, 13 gm fat, 2 gm saturated fat, 0 mg cholesterol, 29 gm carbohydrates, 6 gm fiber, 7 gm protein, 219 mg sodium.
Ingredients:
For the salad:
1 1/2 cups black beans, canned, drained and rinsed (1 15-oz. can)
1 1/2 tablespoon red wine vinegar
1/4 teaspoon salt
1/4 freshly cracked black pepper
3/4 cup quinoa
1 1/2 cups water
1 large red pepper, roasted, seeded, peeled and diced (can be from a jar)
1 small-medium red onion, diced (about 2/3 cup diced)
2 tablespoons pickled jalapeno chiles, diced
1/2 cup fresh cilantro, finely chopped

For the dressing:
4 1/2 tablespoon fresh lime juice
1/4 teaspoon salt
3/4 ground cumin
Pinch of cayenne pepper
1/3 cup extra virgin olive oil

Tuesday, May 24, 2011

Recipe #36 - Baked Chicken Meatballs with Peperonata

_______________________________________________________________________________

I was looking through a Self magazine and stumbled across a couple recipes that were featured on www.epicurious.com. So I headed over to the website to find that it has everything from quick & easy to gourmet type recipes. Unlike many other sites I've found, Epicurious seems to have taken the recipes a step further. Either by adding an extra ingredient for more flavor or by explaining the cooking process more clearly.

I enjoyed looking through the recipes. Inevitably, I found one that I wanted to try out: Baked Chicken Meatballs with Peperonata.

To make the peperonata: 
Preheat oven to 400 degrees F with racks in upper and lower thirds.

Toss bell peppers with 1 tablespoon oil, then roast in a 4-sided sheet pan in lower third of oven, stirring occasionally, until tender and browned, about 35 minutes.

Stir together capers, vinegar, red pepper flakes, and remaining 1/2 tablespoon oil in a medium bowl and set aside.


To make meatballs:
While peppers roast, soak bread in milk in a small bowl until softened, about 4 minutes.


Cook pancetta, onion, and garlic in 1 tablespoon oil with 1/2 tablespoon each of salt and pepper in a 10-inch skillet over medium heat until onion is softened, about 6 minutes. Cool slightly.

Squeeze bread to remove excess milk, then discard milk. Lightly beat egg in a large bowl, then combine with chicken pancetta mixture, bread and parsley. Form 12 meatballs and arrange in another 4-sided sheet pan.


Stir together tomato paste and remaining tablespoon oil and brush over meatballs, then bake in upper third of oven until meatballs are just cooked through, 15 to 20 minutes.


Toss bell peppers with caper mixture.


Serve meatballs with peperonata. A nice accompaniment is garlic bread made from the remainder of Italian loaf.

Though I was discouraged when I had a hard time stomaching the smell of the ground raw chicken (it smelt sooooo different than raw chicken legs or boneless chicken), these really did turn out well. I've never cooked with ground chicken before. Ground beef and turkey, yes, but this was an entirely new experience for me.

I'm slightly shocked that I even pulled this recipe off. It was labeled as a "gourmet recipe" and had a difficulty rating of 4 out of 5 for culinary skills. There is no way I would have been able to do this 4 months ago. It's just proof showcasing how much I've learned with this challenge already.

Rating: 7
Time: 2 hours
Serves: 4
Ingredients:
For the peperonata:
3 red bell peppers, cut into strips
1 1/2 tablespoons extra virgin olive oil, divided
1 1/2 tablespoons drained capers
1 teaspoon red-wine vinegar
1/8 teaspoon hot red pepper flakes

For the meatballs:
3 slices Italian bread, torn into pieces (1 cup)
1/3 cup milk
3 ounces sliced pancetta, finely chopped
1 small onion,  finely chopped
1 small garlic clove, minced
2 tablespoons extra virgin olive oil, divided
1 large egg
1 pound ground chicken
3 tablespoons finely shopped flat-leaf parsley
1 tablespoon tomato paste

Tuesday, May 17, 2011

Recipe #35 - Blackened Salmon

_______________________________________________________________________________

This is a very simple and extremely flavorful recipe. It's one of my mom's personal creations. She watched a friends make it once a few years back. She changed up a few of the technics and used different seasoning. I've had it quite a few times over the years, so I thought it was my turn to give it a go!

Start by rinsing the salmon off. Remove as many scales as possible from the side with the skin. Pat salmon dry with a paper towel. Leaving the skin on, rub all sides of the salmon with the olive oil. Then sprinkle salmon with the creole seasoning, pat in well.


This part can get really messy! 
(I recommend doing this next step outdoors because the skillet puts off a lot of smoke.)

Melt the butter on a heavy skillet. Place the salmon in the skillet and cook on one side until dark brown, about 7 minutes. Flip and cook on the other side until dark brown and cooked through.


And you're finished!


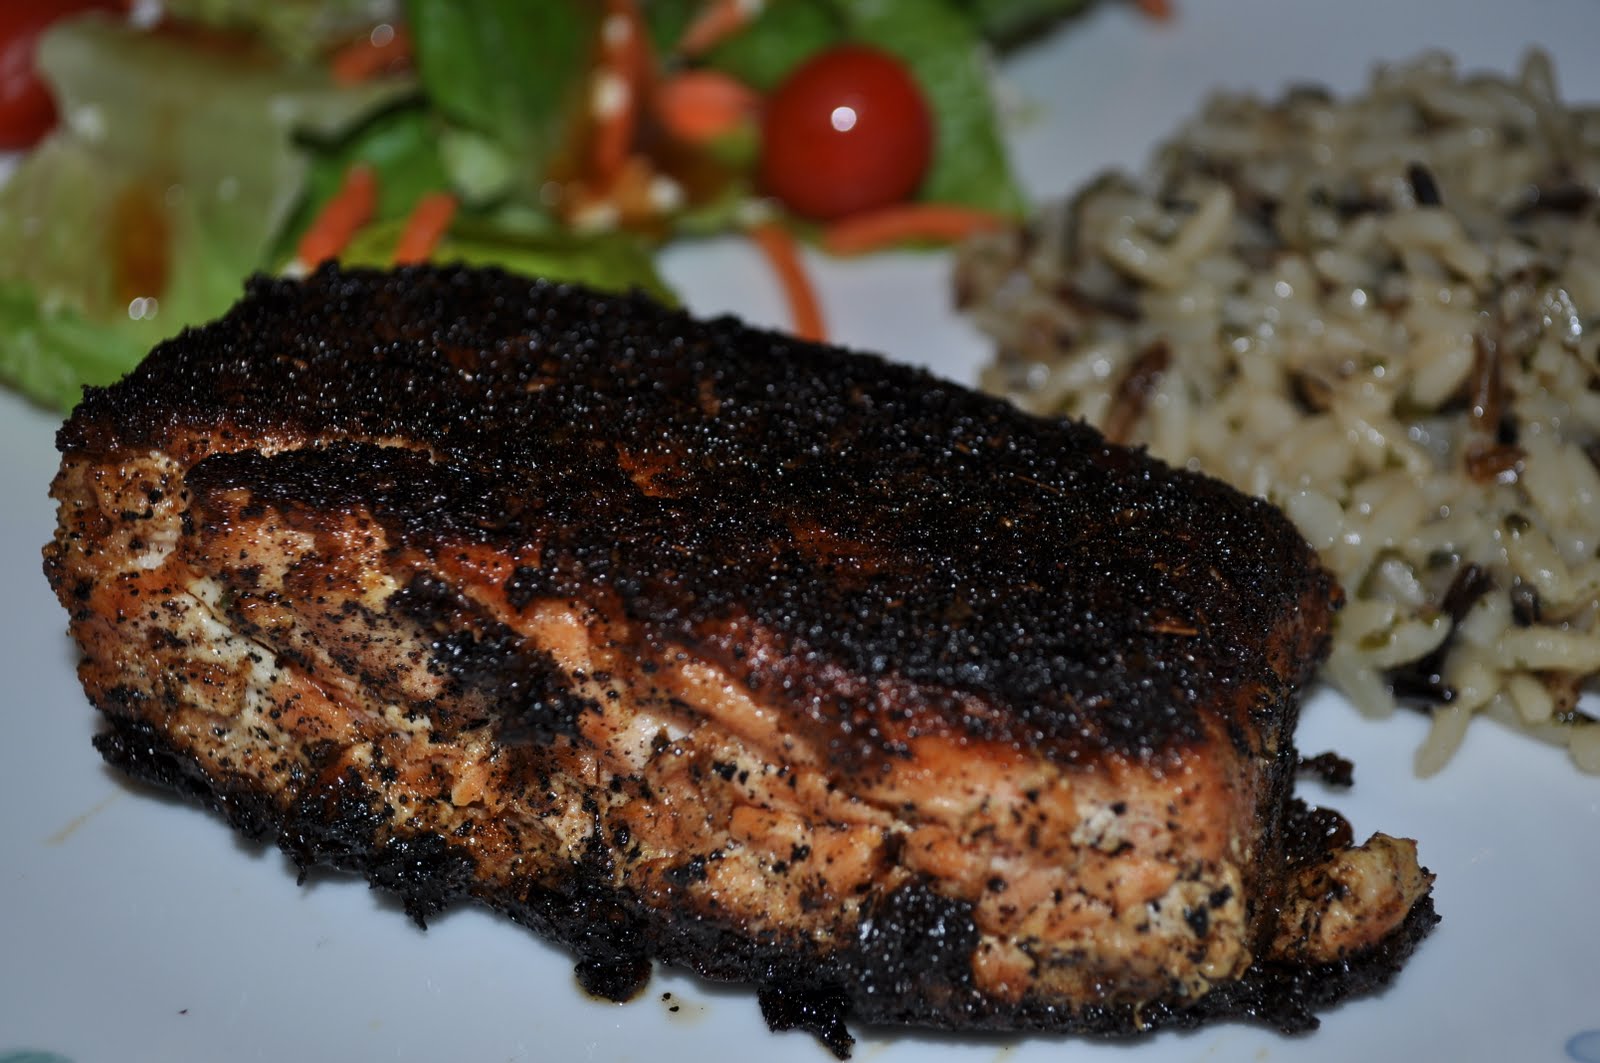
I know it looks burnt, but it's really not. It turned out very well. The salmon fell apart perfectly in my mouth, accompanied by the little crunch of the skin.

I served the Blackened Salmon with long grain wild rice and a mixed green salad with sun dried tomato dressing.

Rating: 9
Time: 45 mins
Serves: 4
Ingredients:
1 1/2 pounds salmon (I used Alasken King Salmon)
6 tablespoons butter
Olive oil - as much as necessary
Creole seasoning - as much as necessary (I used Tony's Creole Seasoning - it's the best!!!)

Friday, May 6, 2011

Recipe #34 - Braised Short Ribs

_______________________________________________________________________________

This recipe came from Geoff Garrett, a copilot my father recently flew with on his trip to Calgary, Canada. At some point during the flight, the conversation turned toward cooking (it must have been a long flight) and Dad told him about My Year of 25 challenge. Geoff told Dad about his favorite Braised Short Ribs recipe. Immediately, Dad came home and began begging me to make this recipe every day for over a week! Which was a nice break from him begging me to cook crawfish (yuck!) for the last month. So I compromised, short ribs it was!

I had initially planned to make this for Easter dinner. However, on Easter Sunday, I went over to the Pina family's cookout with the intension of only eating a few nibbles. Epic fail. I could barely walk out of there, let alone cook short ribs for dinner. So, I made them the following Monday.


Preheat oven to 325. Heat oil in a dutch oven or large, heavy covered pot over high heat. Season ribs with Creole seasoning (I used Tony's Creole), patting it in well with your hands.


When pot is nearly smoking add ribs without crowding them and sear on all sides until they form a brown crust. Do this in batches, if necessary. When all ribs have browned set aside.


In the same pan used to sear the ribs, odd onions, celery and carrots; saute 1 minute to brown slightly or until onions are transparent. Stir in tomatoes, garlic, vinegar, Worcestershire, bay leaves, and pepper.


Now I tried to use a Pyrex dish, but it wasn't deep enough. So I transferred it to the dutch oven. Place ribs in the Dutch oven and add vegetable mixture. Add enough broth to just cover the ribs and bring to boil. Place the dutch over on a cookie sheet and then put it into the oven. Cover and let simmer until very tender, about 2 1/2 hours. About an hour and 1/2 in, the broth had boiled down and I added the rest of the 2 quarts that was called for.


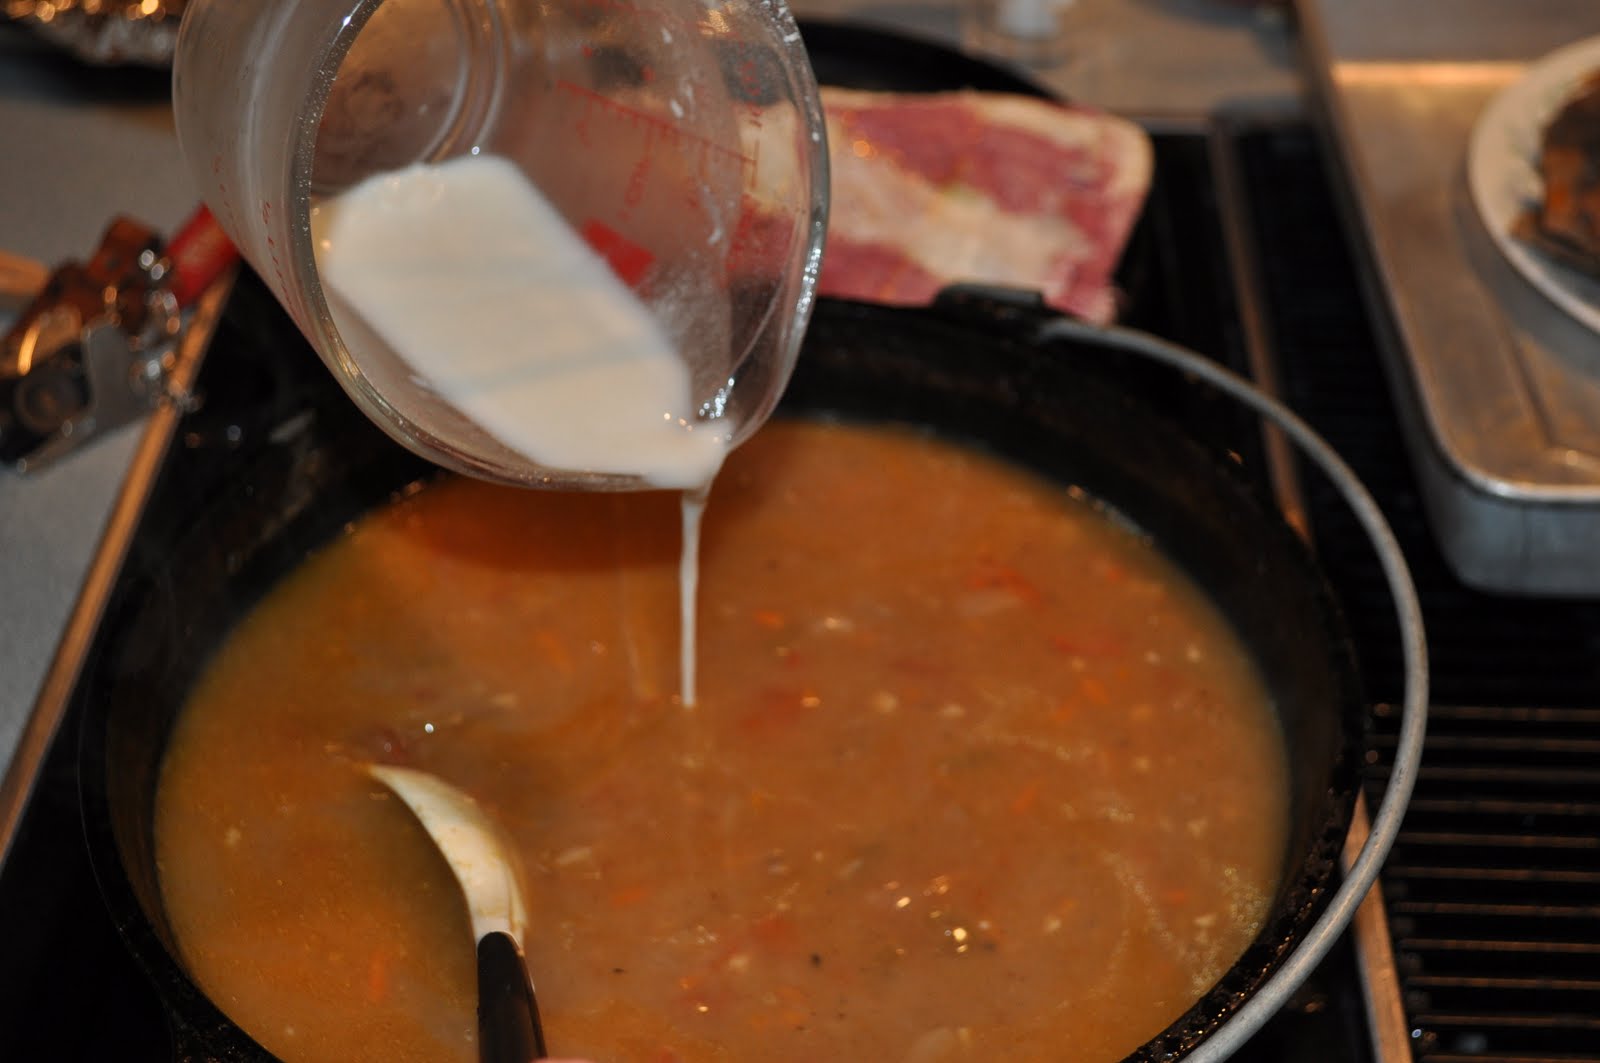
Remove ribs from sauce and set aside. In a separate cup, mix together 8 tablespoons flour and 2 cups water. Slowly pour the flour mixture, while constantly stirring, into the sauce creating a gravy. (Add more flour mixture for thicker gravy.)


To serve, mound ribs in center of 3 plates, spoon sauce over and garnish with chopped scallions. Serve with egg noodles (which you can add the gravy too as well).


Sticking to the FedEx theme, my father was on a layover with another co-pilot, Dave Brown, in Panama City, Panama. Dad had bought dinner and drinks for him the night before. To return the favor, Dave showed up  to the flight the next day with a bottle of Argentinian red wine. He had learned a thing or two about South American wines when he did a foreign exchange tour with the Air Force before he worked at FedEx. Dad, again, shared with him my cooking challenge and told Dave that he'd find the perfect meal to pair it with. Red meat with red wine. Two FedEx stories. It was a no brainer to drink it with this recipe. It paired very well.

This recipe said it served 4, and I guess it depends on the cut of the short ribs, but I only had 6 ribs. That was only enough for 2 per person. I think that you could almost double the amount of ribs while keeping the other ingredients the same. I had a lot of left over gravy, that just went bad after a while.

The 2 1/2 in the oven was perfect! The original recipe said to do it over the stove, but Geoff suggested transferring it to the oven to help maintain a constant temperature. It worked beautifully. The meat was just falling off the bones and perfectly tender.

Rating: 10
Time: 3 hours
Serves: 3
Ingredients:
2 tablespoons vegetable oil
2 1/2 pounds short ribs, cut into individual ribs
2 tablespoons Creole seasoning
1 cup chopped onions
1/2 cup chopped celery
1/2 cup chopped carrots
1 cup peeled, seeded and chopped fresh or canned tomatoes (I used fresh)
2 tablespoons chopped garlic
1/2 cup red wine vinegar
2 tablespoons Worcestershire sauce
3 bay leaves
2 teaspoons black pepper
2 quarts beef broth
1/2 cup chopped scallions (green part only) for garnishing

Tuesday, April 26, 2011

Recipe #33 - Italian Easter Egg Wreath

_______________________________________________________________________________

I needed an Easter recipe, so I posted on my Facebook wall asking my friends for suggestions. It came down to two recipes: Deep Fried Coyote (suggested by my Uncle Mike) and Italian Easter Egg Wreath (suggested by my friend Amanda Loveday). Though I credit my uncle for his ballsy, creative submission, but the decision to make the Italian Easter Egg Wreath was simple.

Seeing as I have never heard of an Italian Easter Egg Wreath, I consulted my best friend: Google. After filtering through quite a few recipes, I decided to pull from a couple different ones, but mainly followed one I found on AllRecipes.com.


In a large bowl, combine 1 cup flour, sugar, salt and yeast; stir well. Combine milk and butter in a small saucepan. Heat until milk is warm and butter is softened but not melted.


Gradually add the milk and butter to the flour mixture; stirring constantly. Add two eggs and 1/2 cup flour; beat well. Add the remaining flour, 1/2 cup at a time, stirring well after each addition. When the dough has pulled together, turn it out onto a lightly floured surface and knead until smooth and elastic, about 8 minutes.


Lightly oil a large bowl, place the dough in the bowl and turn to coat with oiil. Cover with a warm, damp cloth and let rise in a warm place until dough doubles in volume. About 1 hour and 20 minutes, depending on how warm the place you set the dough.


Deflate the dough and turn it out on at a lightly floured surface. Divide the dough into two equal size rounds; cover and let rest for 20 minutes. Roll each round into a long roll about 36 inches long and 1 inch think. Using the two long pieces of dough, form a loosely braided (twisted) ring. leaving spaces for the five colored eggs. Seal the ends of the ring together and use your fingers to slide the eggs between the braids of dough.


Preheat oven to 350 degrees F. Place loaf on a buttered baking sheet and cover loosely with a damp towel. Place loaf in a warm place and let rise until doubled in bulk, about an hour. Brush risen loaf with melted butter.

Bake in preheated oven for 30-40 minutes. (Check every 5 minutes or so, because mine baked a lot faster than time mentioned in the original recipe.)


One thing the recipe didn't mention, but I found on another recipe: Do not cook the eggs before, they will bake along with the bread in the oven. I had already hard boiled and dyed mine when I found this out, so they were double cooked, and discarded after the bread was eaten. Also, you can add sprinkles to the top of the bread to bring more color in as well.

This was my very first bread that I made from scratch. I have seen my mother make them growing up, but never participated in the process. I used to braid bread all the time when I worked at Subway in high school, so that part was very simple.

I had fun making this recipe! It was very festive. I loved the sweet smell of the bread baking that filled the house. I wish they made a "Freshly Baked Bread" scented candle. Bc I'd buy it!

However, I did forget to take off my rings and bracelets while I was kneading the dough and it was almost impossible to get it out of all the crevasses. Lol. Lesson learned.

Happy Easter Everyone!!!

Rating: 6
Time: 4 hours total
Serves: 6-8
Ingredients:
2 1/2 cups all-purpose flour, divided
1/4 cup white sugar
1 teaspoon salt
1 (.25 ounce) package active dry yeast
2/3 cup milk
2 tablespoons butter
2 eggs
5 whole eggs, dyed if desired
2 tablespoons butter, melted

Wednesday, April 20, 2011

Recipe #32 - White Bean Dip with Pita Chips

_______________________________________________________________________________

This was another recipe recommended to me by my friend Monica. It was one of the many amazing recipes made for Lynsey's surprise birthday party back in February. I've always wanted to try making a humus and this one was so tasty.


Preheat the oven to 400 degrees F. Cute each pita half into 8 wedges. Arrange the pita wedges evenly over a large baking sheet. Brush the pita wedges with 2 tablespoons of the oil, then sprinkle with the oregano and 1 teaspoon each of the salt and pepper. Bake for 8 minutes, then turn the pita wedges over and bake until they are crisp and golden, about 8 minutes longer.


Meanwhile, in the bowl of a food processor, combine the beans, parsley, lemon juice, garlic, and the remaining 1/2 teaspoon of salt and 1/4 teaspoon of pepper. Pulse on and off until the mixture is coarsely chopped. With the machine running, gradually mix in the remaining 1/4 cup of oil until the mixture is creamy. Season the puree with more salt and pepper to taste. Transfer the puree to a small bowl and serve the pita toasts warm or at room temperature alongside.

Side note: The pita wedges and bean puree can be made 1 day ahead. Store the pita wedges airtight at room temperature. Cover and refrigerate the bean puree.


There was a couple things I did differently. I added an extra clove of garlic and a tablespoon more lemon juice. As I was blending the puree, I was tasting it and felt that it didn't need as much oil. So I changed the 1/3 cup to 1/4 cup oil.

I actually had fun making this recipe! I am a huge humus fan and was excited to taste the end result. This one did not disappoint! And surprisingly easy to make. I'd definitely make this one again.

Rating: 10
Time: 30 mins
Serves: 6
Ingredients:
4 pita breads, split horizontally in half
2 tablespoons plus 1/3 cup olive oil
1 teaspoon dried oregano
1 1/2 teaspoons salt, plus more to taste
1 1/4 teaspoons freshly ground black pepper, plus more to taste
1 (15-ounce) can cannellini beans, drained and rinsed
1/4 cup (loosely packed) fresh flat-leaf parsley leaves
3 tablespoons fresh lemon juice (from about 1 lemon)
2 garlic cloves

Tuesday, April 19, 2011

Recipe #31 - Dominican Chimichurri Burgers

______________________________________________________________________________

So my attempt at stepping outside the box and making something a little different didn't turn out the way I'd hoped. I wanted to make a burger with a twist and found this recipe at epicurious.com.


What pairs perfectly with a burger?! Home brewed beer, of course! My dad just finished putting his home brew into a keg that my brothers bought him for Christmas. All day he kept saying, "You know what would fix that? A beer from the keg." or "You know what would go well with that (talking about cereal)? A beer from the keg." So, finally, he got to have his beer from the keg.


Start by mixing together the beef onion, bell pepper, garlic, cilantro, oregano, soy sauce, Worcestershire sauce, a scant 1/2 teaspoon pepper. Form into 4 (4 1/2-inch-wide) patties. I had a little more beef than the recipe suggested, so I had enough to make one more patty.


Heat on a 12-inch heavy skillet over medium heat until hot, then lightly toast buns. Oil skillet, then cook patties, turning once, about 8 minutes total for medium-rare. Transfer to buns.


Mix together cabbage, carrot and 1/4 teaspoon salt, then cook, turning occasionally, until slightly wilted, about 2 minutes. Divide among burgers.


Oil skillet again, then sear onion and tomato, turning once, until slightly charred, about 2 minutes total. Divide among burgers.


Stir together ketchup, mayonnaise and mustard, then top burgers with sauce.


Looks pretty huh? There was just a lot going on in this recipe. A lot of different flavors and ingredients that seemed to clash rather than blend together like I was anticipating. At least in my opinion. My sister and mother, however, loved this recipe. It really wasn't that bad I guess, but the flavors were very confusing for my father and I.

Time: 45 minutes
Rating: 4
Serves: 4
Ingredients:
1 1/4 pound ground beef chuck
1 medium onion, finely chopped
1/2 large red bell pepper, diced
2 garlic cloves, minced
1/3 cup chopped cilantro
1 teaspoon dried oregano
2 teaspoons soy sauce
1 tablespoon Worcestershire sauce
4 hamburger buns, split
2 cups thinly sliced cabbage
1 carrot, coarsely grated
1 small red onion, cut into rings
1 tomato, sliced 1/4 inch thick
2 tablespoons ketchup
2 tablespoons mayonnaise
1 tablespoon mustard